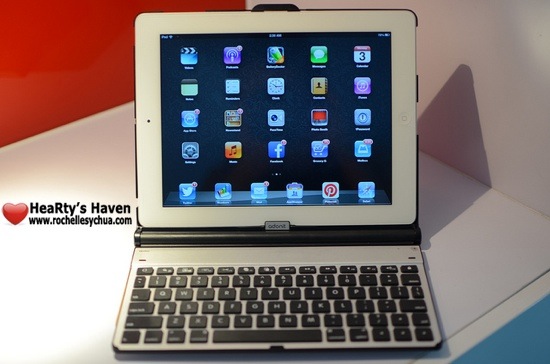
Glass is not for typing.
That’s the tagline of my newest iPad accessory, Adonit Writer Plus. And yes, I do agree with the tagline. While we can type in glass, it’ll take much effort especially if we are trying to type long articles on our iPad. That’s why Adonit Writer Plus is now something that I bring everyday.
The Writer Plus consists of a Folio case and a Bluetooth Keyboard. In fact, I blogged about this review on my iPad. With Writer plus, I can now make more use of my iPad!
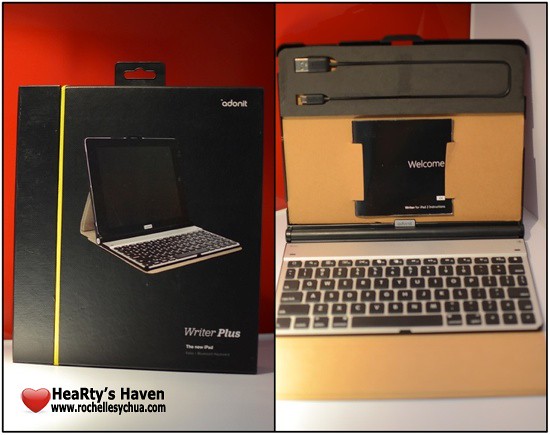
WHAT IS IN THE BOX OF THE WRITER?
Oh yes, the beauty of opening the box and the eagerness to take out each component. The excitement to be able to assemble everything and use the accessory ASAP. I just love it!
So here are what’s inside: the Writer (Folio + Bluetooth keyboard), Instruction Manual & USB Charging cable.
ANATOMY of the Adonit Writer Plus a.k.a. Writer
The next thing I did was to inspect the Writer. There are 2 main functions: to protect the iPad through the Folio and to be able to type on a keyboard through the bluetooth keyboard.
When I checked it out, I realised that while the Writer looked simple, each and every little part has a function that made the whole accessory useful.
FOLIO
- cover – I think there could be a better way to design the outer covering of the writer but it works just fine.
- protective fabric – inner surface of the writer which means that the iPad is protected inside and out 🙂
- magnetic closure – the Writer uses the same type of closing mechanism as Apple’s smart cover, a magnetic one!
- frame – this is where the iPad sits. It basically holds the iPad together with the Writer.
- frame cutouts – parts of the frame which have been cut out to give access to the iPad ports and buttons.
- magnetic plate – I love how the magnet inside the writer can hold the keyboard and iPad to the position that we want them to.
KEYBOARD
- keyboard – the keyboard and basically why I wanted this accessory in the first place. And oh, it’s detachable from the Writer!
- indicator LED – the LED at the top right corner of the keyboard which shows if it’s ready for bluetooth pairing. It’s also a power indicator, reminding us if we need to recharge the accessory.
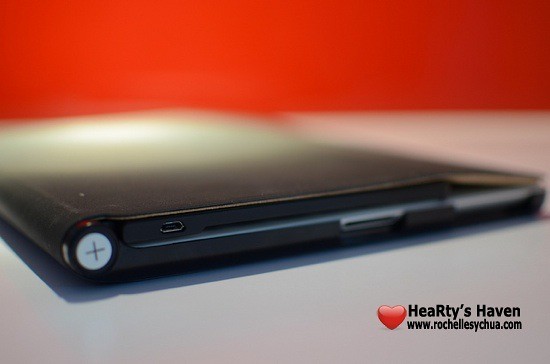
- micro-usb port – located at the top right side of the keyboard, used for charging.
- pairing button – button at the top right corner of the keyboard which we press to activate the pairing of the keyboard and iPad.
- on/off switch – located at the back of the keyboard. It takes a bit of effort to turn it on using my finger so I ended up just leaving it on. the battery life works great anyway.
- rubber bumpers – I do not remove the keyboard from the Writer when I put the iPad on my bag. That’s why I’m just glad that rubber bumpers on the keyboard protects my iPad screen from any damages. Super love this part!



INSTALLING THE WRITER
The trick to properly place the iPad to the writer is by inserting the iPad while the accessory is playing flat on a surface. Next is to ensure that the iPad is aligned with the frame cutouts.

CONNECTING THE WRITER
Connect the Writer to the iPad by turning on Bluetooth on your device.
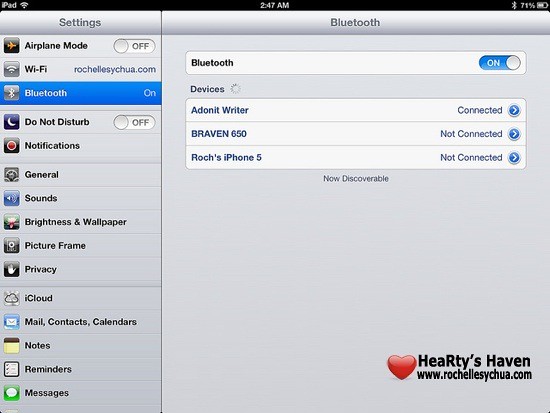
Once activated on the iPad, you just have to press and hold the pairing button on top right of the keyboard for several seconds. The indicator LED will show a green blinking light and you’re ready to go.

CHARGING THE WRITER
Once the LED indicator light shows red color, it’s time to recharge the accessory. You just need to connect the included micro-USB cable into the micro-USB port at the top right side of the Writer.
The battery lasts for 2 weeks with normal use.

USING THE WRITER
Now, here’s the enjoyable part whenever I get an accessory – to be able to experience its functionalities and features. I’m really glad that I found this case because I ended up being more productive because I can type on a keyboard! 🙂
Here are some of the features of Adonit Writer Plus for the iPad:
- Both the keyboard (from a simple pull) and the iPad (through the quick eject) are easy to remove from the Writer.
- The Magnetic Seal enables the iPad to go to sleep whenever the folio latches on to it.
- The auto wake & sleep function works not only for the iPad but also for the Writer’s keyboard. This explains why the keyboard works for a long time without charging.
- The keyboard wirelessly connect to the iPad via bluetooth.
- You can put your iPad in any angle because of the magnetic plate that securely places it wherever you want.
- The protective fabric inside the writer serves as a cushion between the iPad and keyboard. Other than that, it’s scratch resistant!
- Adonit Writer Plus doubles as a case just in case you don’t need a keyboard.
- keyboard – apart from being able to type numbers and letters through the writer, you can also do certain things via special keys at the top part of the keyboard. Things like going to the Home screen, search window, image gallery, bringing up virtual keyboard, cut/copy/paste functions, control music and sounds and locking the iPad screen.
Apart from all those nifty features, what I ended up with is that I started writing more using my iPad. I blog more and I use Pages, Numbers and Keynote iOS apps more often. I tend to start writing my thoughts on my iPad and I’m already contemplating on starting a diary. In the end, Adonit Writer Plus boosted my productivity.


IN SUMMARY
I super love the Adonit Writer Plus! It makes writing easier! With the accessory, I can actually transform my iPad into a full-pledged laptop. Some of my friends even thought that I was using a compact laptop 😛
PROS:
- functional detachable keyboard
- slim & portable
- rechargeable batteries
- can double as a case
CONS:
- folio design could be better
- on/off switch is difficult to use
The Adonit Writer Plus for iPad is available for Php 4,990.00 in the Philippines.


Leave a Reply